Today is the Twin Cities Annual Chicken Coop Tour. I think this is our fourth year on the tour. I'd hoped to get our coop remodel done by today, but what with starting a full time job and other distractions, we're only part way through. I'm sure Jeremy wishes we were done too! But the coop is certainly functioning and showable.
Here's what we've been up to the last few weeks:
Inside the coop you can see we got the sheathing up on the north and east walls. The chickens were quite interested in the power tools.
Windows in on the west and south walls:
Once all the outside sheathing/windows were done, Jeremy got to work on removing the original hen house from the inside. Doors off first!
Then dismantling the floor...
...and cutting that away, all but the last foot or so in the back. We're planning to add three more nest boxes under the original three and have their food and water under this ledge. You've got to have a cover over those things or they'll poop in it!
Here it is on the outside with the trim and paint mostly done! Okay - the only part of the exterior that isn't done is on the north and east walls which you can't see at this point. Pics of those ... later?
Inside! Readers may remember our tiny mini-coop we put in last year. We decided with the remodel to turn that to the side and make the entrance go right into the main coop. When I post pictures of the north side this will make more sense. It's blocked off at the moment because the chickens were trying to eat the rigid insulation! After some more finishing touches they won't be able to get at that.
We added an extra roosting bar spanning the whole length of the coop - but these are all temporary. There are 3-4 silver leghorns that have been roosting up in the rafters and attic space for the last year. We'll be putting a ceiling in soon and putting a stop to that. And we're thinking about the best design for roosting space.
This unfinished state works quite well now because it has been quite warm the past few weeks. But pretty soon we'll get insulation in the walls and sheathing up. Then they'll be nice and toasty for winter. Plus, on the really cold days when we can't let them out of the coop, they'll have plenty of space to roam around, and access to their food and water. I think they will be much happier.
Now, it's almost 10:00 and that's when the coop tour starts. I'd better get out to the coop!
Saturday, September 14, 2013
Friday, August 16, 2013
Busy bees
A few weeks ago we did a check up on the bees. They seemed quite active to me, maybe a little different than usual. It's hard to say how you can recognize bee behavior, especially when I don't stick my head in to see what they're up to all that often.
But somehow, things seemed a big different. We had two boxes on at that point. I'm so bad with all this bee terminology, I don't even know what they're called (which I'm sure would be really helpful). In any case, there were two boxes, and a third on that top that had some bee food. That was to help them get through our super cool spring and the beginning of summer.
Jeremy took that box off and then we started looking into the top box with frames. Holy cow. The bees had been REALLY busy! Each of the individual frames of honey/way/etc probably weighed 4-5 pounds a piece! It was intense!
Anyway, we swapped some things around and then put on a third box. This is good news for us and the bees. Last year our bees never got far enough along for a third box. Jeremy is going to check them again this weekend and see if it's time to put a super on. (I do know that word! Uh... not exactly sure what that means. I DID take a long class about all this and read a lot, but I've forgotten!)
A few days after adding the third box, the bees were doing this:
I'm hoping they were just partying. A beekeeper friend says it's possible this was robber bees stealing our honey! But we're not sure yet if anything has gone wrong. They're not doing this anymore and there continues to be bees coming and going from the hive. So we'll see!
Thursday, August 15, 2013
Remodel!
Remodel our house!? Finally finish the bathroom; the gaping hole in the floor!? Finally finish the front hall, the railing, repair the plaster? Do the big giant kitchen remodel!?!?
No.
No, we are remodeling the chicken coop. You heard me. The chicken coop. Our needs must wait, the chickens come first around here.
Well, I guess that's not entirely true, but a chicken coop remodel is much more affordable/manageable at this point in time. I've been pretty excited about this remodel for at least a year, maybe two. At least since our two dozen birds got big and their house wasn't big enough. The annex was meant to fix this, but it hasn't been convenient to use, so took on a temporary status. You know: 'permanent temporary.'
Just as a reminder, here is what we've got now:
(The annex to the right.)
Jeremy has been dreading this project for as long as I've been excited about it (of course). But I finally talked him into breaking it down into small manageable steps that take no more than a couple hours each. We're going to attack the coop one wall at a time, one piece at a time, and hopefully finish it by mid-September!
The first step was to replace the old Dutch door. Having your human door swing into the coop is bad. A big no-no. Take it from us: don't do it! We never would have done it that way, but the whole coop was designed for a completely different location where the door couldn't swing out. Of course then we moved to a new house and it didn't matter - but the coop was already done! So we've been dealing with this stupid door ever since. One problem is that the chickens kick piles of straw and stuff up around the door until you can't open it anymore. Luckily the top opens independently so you can open that and use a shovel to try to dig out the door. Another problem is that when you go in you have to open the door wide enough to get in and get past the door, which often leads to sneaky little chickens escaping! Also, when you're trying to remove anything from the coop - the food bin, a bucket of poopy straw for the compost, a sick chicken - it's hard to hold onto that thing and get the door open at the same time, without letting half a dozen chickens escape at the same time!
We dug a regular house door out of the garage and cut it down. The glass was broken out at some point so we screwed on an old storm window. A couple coats of paint was all this baby needed.
So - door now opens out. And isn't it a fabulous door!?
Next up: the east wall.
Saturday, June 1, 2013
Spring!
I guess it's technically spring since summer doesn't start till June 21st, though I'm sure most of us consider summer to start on June 1st. But... I'm also used to spring meaning a lot of flowers and things growing. This year winter lasted till May and everything is slow getting started.
I'm very disappointed that my entire garlic crop seems to have failed. A dozen or more shoots were up a month or so ago... and then they just sort of died and disappeared. I've heard others had this problem, so I assume it's the weather and not just me.
In any case, I've been seeing flowers blooming all over the place though ours have been slow. Two of our phlox varieties are blooming and the Bleeding Heart.
My first Siberian Iris bloomed just this morning:
It's hard to tell the size... and still sort of hard even with my hand in the picture. But these are smaller than regular Iris.
They grow in a large clump that looks sort of like grass and dozens of these beauties bloom at the same time. They're one of my favorite flowers in the yard.
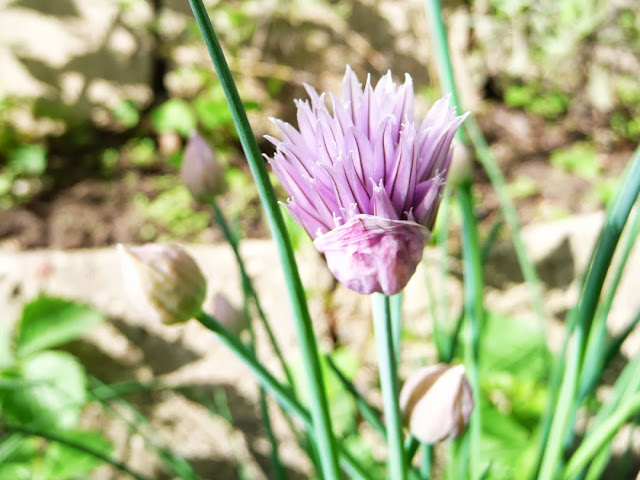
In other garden news, what happens when you let your chive plants go to seed?
Baby chives!! Lots of baby chives. I saw these yesterday and thought for a moment it was grass - but there was something about it... I picked off a piece to chew and they were chives. There are a dozen or more in this spot and a few in other areas. They each consist of two or three little chive blades and, did I mention, they're tiny?
They are to the left and front of one of our main chive plants here, near the stepping stone. See them? Like I said, they're tiny!
This is very exciting though for our plans of turning the terrace into a perennial herb garden. Chives are taking over this spot for sure!
Also recently I planted out the top of the terrace with a variety of thyme. There is also some parsley and nasturtium up there. Unfortunately parsley is an annual here. And frankly, I've never seen nasturtium re-seed itself. (I guess it would help if Jeremy would stop eating the flowers before they can go to seed!)
Sunday, May 26, 2013
Nesting
I was just sitting down to a quiet lunch and heard a funny sound. It was sort of a scratching, crunching... hard to identify sound. But clearly not natural. I though maybe we had mice gnawing on something in the living room. I moved out through the house slowly, stopping every few feet to make sure I was still hearing the sound and figure out what direction to go in.
I got through the living room and realized the sound was coming from outside, but close, maybe on the front porch. I looked out the window, saw nothing. I went to the door. The sound was loudest there. I peeked out the door and saw:
I opened the door and scared him off so I could take a look at the damage:
This old door used to have some sort of extra lock which we took out some years back. Jeremy filled the hole in with some foam stuff. It has stood the test of time...until now. I went to get some tape and the bird came back and kept digging! He'd be pretty surprised once he broke through the foam to find not just a nice nesting spot, but a whole house at his disposal. Just what we need. I shooed him off again and taped over the hole. I suspect he can get in through tape too so we'll have to keep an eye on this. I have been wanting to put up some bird houses - maybe now is the time! And it also adds a bit more urgency to getting our new doors installed.
Yes, we have brand new, beautiful doors all painted and ready to install (you can tell by the photo that we obviously are way past due for an upgrade!). Jeremy doesn't have the time because of mushroom stuff so we're getting a local contractor/builder to do it. They have to squeeze us in so they'll be giving us a couple days notice and then the doors can go in. We haven't heard anything yet, but I hope we can get them installed before the birds get through and move in!
Monday, April 8, 2013
Embarrassing (aka: I Told You So!)
Those of you who remember our "freezer challenge" from a couple years ago may not be surprised by this. Our freezers are still jam packed full of stuff and we have pretty much lost touch with what's hiding in there.
I think I've mentioned this before, but Jeremy has a thing with a fully stocked larder. He doesn't feel safe, or like we have a real home, if there isn't food spilling out of every crevice in the house. He didn't grow up poor or starving or anything, so I don't know where this comes from. But he really does feel giddy when we have lots of food around.
I've been saying for some time that we should do an inventory of the chest freezer out in the garage. Winter (or at least Minnesota's freezing spring weather) is a great time to do it since it's practically the same temperature in the freezer as it is outside. Taking everything out and cataloging it is not an easy one person job. I've been suggesting we schedule this for weeks, or many months, but I don't think Jeremy was convinced. He thought he knew what was in the freezer.
Uh-huh. (That's a little foreshadowing for ya!)
Jeremy had some meal idea yesterday and he kept remembering that we were hung up because we didn't have chicken broth. Grr. He'd have to make some. He said he was going to go out to the freezer and look for...something. Chicken parts, or something, I can't recall now. I innocently suggested that maybe I should go with him, with a pad of paper, and maybe now would be a good time to just take a quick little inventory... Jeremy hesitated for a moment, and then gave in.
We trooped out to the freezer, set up a few temporary tables to hold things, and started emptying it out. Holy cow. It's stunning how much stuff is out there! Jeremy, with a bit of shame, admitted I was right and this was a good idea. Why? Well, for one thing we found at least FIVE containers of chicken broth!! =)
What else was in there?
- lots of bacon
- a few packages of pork soup bones
- bags and bags and bags of mushrooms and mushroom stems (the stems are for stock)
- package of ham
- bee pollen and sugar for the bees
- loads of bread: sandwich bread, hot dog buns, rolls, fancy breads, bread flours
- beef brisket (when the heck did we get that!?)
- two packages of cream corn (Jeremy had just said that day we should make sure to preserve corn this year since we didn't have any now. Uh-huh.)
- 4 pie crusts
- tons and tons of blueberries, raspberries, cherries, strawberries
- edamame
- butter
- chicken innards and chicken feet and packages of chicken necks and backs, probably a dozen altogether (for the stock)
- zucchini
- roasted sweet pepper juice. yes, juice. What are we doing with this??
- banana
- pesto (Jeremy was really excited about this)
- 3 whole chickens! (Jeremy almost bought another the other day...didn't realize we had some in the freezer still.)
- rhubarb
- cranberries
- asparagus
- loads of squash
- dried currants
- roasted tomatoes
- spinach
- pears
- basil
- coffee beans
- salsa
- grated beets
- shelled peas (from 2008!! I think these are ones we grew ourselves. yikes)
- peaches
- plums
- green beans
- left over whey from when we were making cheese ages ago.
It's kind of embarrassing listing all these riches. I see a lot of fruit ice cream in our future, blueberry muffins, chicken stock, banana bread, zucchini bread...
Later on relaxing in the kitchen I said to Jeremy, "You know what we should go through next?" With a gleam in his eye, he replied, "The canned food!" No. "The other freezer."
He wasn't excited about that, so who knows when we'll get to that one. It's much smaller, but we do use it all the time and it's a disaster. I think a person would have to have their freezer stocked entirely with frozen meals - in boxes - for a freezer to be organized well. It's hard when everything is in plastic bags.
Tuesday, March 19, 2013
Working the bees
The bees arrived in a buzzing little box in mid-April (while I was off traveling in Kenya!). So Jeremy took care of installing them in their new home and there are no pictures of any of that. You'll have to wait for those details because we do have more bees arriving next month. More about that later.
Here they are happy (? - I hope!) in their new home.
Coming and going.
It's not a good idea to disturb the bees too much so we really tried not to. In June Jeremy opened up the hive to make sure things were going well. I know - it's kind of silly that he wears a bee veil but has bare arms! I guess he'd rather get stung on his arm or hand and not his face.
Looking for the queen.
These guys have been busy! Yep, busy bees! =)
Oops, put this board in upside down! You can see how they're building comb all over in any place where there is space. Sue Hubbell talks about the "bee space" which is the ideal distance apart between combs. I think if there is too much space they may find it drafty so they fill it in. We're still working on finding the right spacing for our bees.
Jeremy checked the bees other times too, though it mostly looked the same as that time in June. We had a general idea of how much honey the bees should be making and when we should add more supers. But they were slow for some reason and it was some time before Jeremy felt they needed another super. I think they only got that third box on before fall came. Jeremy went out to check on them for the last time in about October and discovered they had all died.
Here you can see the comb, with honey, and dead bees in the comb.
We don't really know why they died. We've talked with a number of beekeepers and think we've narrowed it down. We're pretty sure it wasn't disease. That's good - one of the bee diseases is so bad the only solution is to burn the whole hive (there is no disagreement about that!). It's possible the queen died for some reason and the bees hadn't been prepared with a new queen. They are pretty dependent on that queen. She makes more bees, so if she dies, the bees slowly die out with no new bees to take their place.
The other possibility is that they starved. The first picture seems to show that: bees crammed into the comb eating the honey. I think we had some cool evenings and it's possible they were too cold to move over 3 inches to find more food. That does happen I guess.
But maybe it's a combination of those two - or neither of them. We don't know. We did learn some interesting things in the process though. First, we had a beekeeper extract the honey for us (she's a professional and has a machine and everything!). She said we had a lot of "wet honey." The bees bring in nectar and store it in the comb; the nectar has a high water content. Throughout the summer they fan their wings to dehydrate it, thereby creating the honey we all know and love. Our bees hadn't had time to dehydrate the nectar all the way so our honey had a high water content. It still tastes fine, the problem is it will go bad faster. We gave some little jars away to family and warned them not to admire the jar for too long - eat it right away! We put the rest in a bucket, secured cheesecloth over it, and set it in front of the heater vent. After a couple months it seemed to be the right consistency. I hope our future bees will do this job themselves!
The second thing I learned was about flowers and nectar. I wondered if our bees just hadn't found enough nectar and that's why they were so slow and then died. But we have tons of flowers in our yard, blooming a lot of the summer! I talked to a beekeeper about this and she said it's possible since there was such a drought last year that there wasn't much nectar in the flowers. I've prided myself on some native and drought-resistant plants - they still bloom and look pretty even when we haven't had much rain. But it turns out they aren't making much nectar and that's what the bees need. So this year I'm going to be better at watering the flowers - and I'm going to mulch better to keep all that moisture in.
In the end I think we got about a gallon or so of honey. Not bad for our first year!
That's all we've got left now; we'd better slow down and make it last! Our new bees are set to arrive at the beginning of April. I'll try not to take a whole year to let you know how that goes!
Oh, for those of you who are wondering, I haven't been stung at all (and I've gotten every bit as close to the bees as Jeremy). Jeremy got stung once I think. As long as you don't bother or harass them, they are very peaceful and content to go about their business.
Here they are happy (? - I hope!) in their new home.
Coming and going.
It's not a good idea to disturb the bees too much so we really tried not to. In June Jeremy opened up the hive to make sure things were going well. I know - it's kind of silly that he wears a bee veil but has bare arms! I guess he'd rather get stung on his arm or hand and not his face.
Looking for the queen.
These guys have been busy! Yep, busy bees! =)
Oops, put this board in upside down! You can see how they're building comb all over in any place where there is space. Sue Hubbell talks about the "bee space" which is the ideal distance apart between combs. I think if there is too much space they may find it drafty so they fill it in. We're still working on finding the right spacing for our bees.
Jeremy checked the bees other times too, though it mostly looked the same as that time in June. We had a general idea of how much honey the bees should be making and when we should add more supers. But they were slow for some reason and it was some time before Jeremy felt they needed another super. I think they only got that third box on before fall came. Jeremy went out to check on them for the last time in about October and discovered they had all died.
Here you can see the comb, with honey, and dead bees in the comb.
We don't really know why they died. We've talked with a number of beekeepers and think we've narrowed it down. We're pretty sure it wasn't disease. That's good - one of the bee diseases is so bad the only solution is to burn the whole hive (there is no disagreement about that!). It's possible the queen died for some reason and the bees hadn't been prepared with a new queen. They are pretty dependent on that queen. She makes more bees, so if she dies, the bees slowly die out with no new bees to take their place.
The other possibility is that they starved. The first picture seems to show that: bees crammed into the comb eating the honey. I think we had some cool evenings and it's possible they were too cold to move over 3 inches to find more food. That does happen I guess.
But maybe it's a combination of those two - or neither of them. We don't know. We did learn some interesting things in the process though. First, we had a beekeeper extract the honey for us (she's a professional and has a machine and everything!). She said we had a lot of "wet honey." The bees bring in nectar and store it in the comb; the nectar has a high water content. Throughout the summer they fan their wings to dehydrate it, thereby creating the honey we all know and love. Our bees hadn't had time to dehydrate the nectar all the way so our honey had a high water content. It still tastes fine, the problem is it will go bad faster. We gave some little jars away to family and warned them not to admire the jar for too long - eat it right away! We put the rest in a bucket, secured cheesecloth over it, and set it in front of the heater vent. After a couple months it seemed to be the right consistency. I hope our future bees will do this job themselves!
The second thing I learned was about flowers and nectar. I wondered if our bees just hadn't found enough nectar and that's why they were so slow and then died. But we have tons of flowers in our yard, blooming a lot of the summer! I talked to a beekeeper about this and she said it's possible since there was such a drought last year that there wasn't much nectar in the flowers. I've prided myself on some native and drought-resistant plants - they still bloom and look pretty even when we haven't had much rain. But it turns out they aren't making much nectar and that's what the bees need. So this year I'm going to be better at watering the flowers - and I'm going to mulch better to keep all that moisture in.
In the end I think we got about a gallon or so of honey. Not bad for our first year!
That's all we've got left now; we'd better slow down and make it last! Our new bees are set to arrive at the beginning of April. I'll try not to take a whole year to let you know how that goes!
Oh, for those of you who are wondering, I haven't been stung at all (and I've gotten every bit as close to the bees as Jeremy). Jeremy got stung once I think. As long as you don't bother or harass them, they are very peaceful and content to go about their business.
Monday, March 18, 2013
Bees...the beginning
I can tell I fell of the blogging bandwagon in a big way when we started a whole new urban homesteading project and I never blogged about it! I know I mentioned it once or twice (and some of you have been patiently waiting for an update - you've told me!). It's amazing that some of these photos are from more than a year ago now. Without further preface and delay: getting into bees!
To start with, we took a day-long beekeeping course, asked tons of questions of everyone we knew who ever had anything to do with bees, and we got some books. The number one thing we learned (which has been backed up by other beekeepers since): PERSONAL PREFERENCE! That is, you'll hear a dozen or more different ways to do any single task with bees (how to feed, care for, medicate, etc) and it's really up to personal preference. Actually, the way Sue Hubbell explains it in A Book of Bees, this is because climate and bee habitat vary from area to area and something that works in one place may not work in another. So really you have to get to know your own bees and your own bee habitat. Don't worry, I get the feeling they'll teach you.
Jeremy was really the instigator of this project. He begged family for gifts of all the beekeeping stuff we'd need, and over the space of about a year he got it! Last Christmas he got boxes of bee frames to put together. Yep, DIY! And there is a lot of little fussy stuff to do when putting these things together.
First he built all the boxes.
He drilled some holes in the fronts to allow for bees to come and go and for extra ventilation. We got little corks to fit in these holes so we could block them up when needed.
Then he primed and painted all of them. Painting is important because the hives sit outside, of course, and the paint will help keep the wood from rotting away.
Then Jeremy built all of the frames. I think these were the most nit-picky of all.
After they're put together you slide the wax foundations in each one, then secure them.
And then start loading them up in the boxes.
Here's all our bee stuff ready to go: bee hive all painted and full of frames, with the base thing down there at the bottom; the smoker; a bee veil; and a hive tool.
This was all done by the beginning of March and our bees were set to come in mid-April. But I was gone when they got here!
Saturday, March 16, 2013
Caution: slow moving spring
The day after we cut those branches down we had some good melt and a bit of rain. The backyard filled up with water.
Those of you who have been around since 2009 know that we dug out our backyard almost as soon as we'd signed the paperwork and took possession of the house. Back in the day, before we did this little fix, all that melting water would have poured straight into the basement. Yes, we bought our house even though there was frozen sheeting water on every wall and a skating rink on the floor! Anyway, now all the water pools in the yard, making it slightly difficult to get to the chickens. But we manage.
During most of the week last week we had really cold temperatures and the lake froze. Not quite enough to walk on, though by the end it was almost there. I finally went out yesterday and started breaking up the ice. It had started thawing from the bottom up. There was some melted water and a bit of ice, an air gap of about 3/4 inch and then this huge slab of ice about 2 inches thick covering the yard. I had to hop up and down on it a bit to get it to break. That was fun!
Another thing that happens when the melt begins - the slabs of snow/ice on our metal roof starts sliding off.
It makes for quite an awning from the inside! I've never seen it curl off like this before. It didn't do any damage to our gutter when it finally broke off after several days.
The worst part about this is the topmost roof. It's nearly flat so the snow/ice doesn't slide off as quickly. The slab will slide out slowly, bit by bit, till as much as 6 or 10 inches is hanging off. Because it's sticking out straight (and not at an angle like the lower roof) the snow doesn't curl, it breaks off suddenly with a sound like a bomb going off. Well, at least that's what it sounds like at 3:00 in the morning! It's kind of fun and exciting during the day - I just wish it was stick to falling off during the day and not during the night. But it's mostly gone now.
A week or two ago we had a friend over who knows about pruning fruit trees. This is something we know nothing about and haven't really looked into much. Now that our old cherry tree is mostly dead, we'd like to work on the two new ones (and the apple tree) and make sure they fare better and are healthier than the old one. Sarah gave us some great tips on how to prune so I'm excited to keep that up.
As we clipped away she told us some of the branches, if stuck in water, would leaf out. So into a glass of water they went. They are leafing out v e r y slowly. Sort of like our approaching spring. It is coming v e r y, v e r y slowly. We're supposed to dip down to single digit lows again this next week. Brr! Come on spring! You can do it! Win the battle against winter!
Friday, March 8, 2013
Didn't see that coming
I've been nagging Jeremy about taking down a few trees in the yard for quite some time now. (Note to self: be careful what you nag for!)
Which it very nicely did for us. Jeremy cut several feet off the bottom of it hanging out of the tree, and then we discovered it was STUCK in the Kitalpa!
Jeremy actually swung from the thing a few times and it was not going anywhere. Hmm. Didn't see that coming!
So now we had a huge branch stuck and swaying ever so slightly in the top of this other tree. I won't go into all the details since our mothers read this and I don't want them to know - it was kind of scary. But I suspect it was like when you see someone tipping back in their chair and you're just sure they're going to fall at any minute, it looks so unsafe! (Or maybe that's just me?) But when you tip back in your chair it feels totally safe. So I'm sure Jeremy felt totally safe, but I was pretty sure he was going to fall off that ladder, chainsaw in hand, at any moment and die a horrible death. Geez, I guess I asked for it when I nagged him for years to cut these darn trees down!
Skip to the end: Jeremy got the huge branch out of the Kitalpa with no injuries to either of us and he cut a second branch off the junk trees for good measure.
Now there is a huge pile of brush to be dealt with - which the neighborhood birds are going to go bonkers over. I don't know why, but they love hanging out in brush piles, dozens and dozens of them. I'll see if I can catch them in the act this weekend.
(In other news, I am very annoyed with Blogger/Picasa/etc for constantly having to update and change things that worked perfectly well before! They have made it very difficult for me to put pictures and text where I want it! Grr!)
There are way too many trees on our tiny 1/8 acre. Some of them are mere inches apart. Three in particular are Siberian Elms - junk trees basically. They spend all year dropping branches and twigs all over the place; spreading their evil weed tree seeds all over the whole yard; and blocking out all the sun to our garden. And to top it off, these trees are known for not having good joints. That is, where branches fork off, the tree is weak and prone to rot, so those big old branches are liable to just fall off out of the blue. (Or in a storm, which happened in 2011.) Unfortunately these trees have gotten very big and are leaning precariously over our house and our neighbors. They have to go! We got an estimate on tree removal last fall. While it's not too expensive, we still can't really afford it. Besides, Jeremy has a chainsaw and we have access to ladders. Surely we can do it ourselves! Er, that is, surely if I nag Jeremy long enough he'll eventually do it! =)
We had some spare time this afternoon and Jeremy whipped out the chainsaw. The plan was to take down one of the big branches. Very big branches. If it fell too far to one side it would take out our neighbor's electrical; too far to the other side it would take out ours. So the plan was to cut it so it would fall into the Kitalpa tree a couple feet over.
Which it very nicely did for us. Jeremy cut several feet off the bottom of it hanging out of the tree, and then we discovered it was STUCK in the Kitalpa!
Jeremy actually swung from the thing a few times and it was not going anywhere. Hmm. Didn't see that coming!
So now we had a huge branch stuck and swaying ever so slightly in the top of this other tree. I won't go into all the details since our mothers read this and I don't want them to know - it was kind of scary. But I suspect it was like when you see someone tipping back in their chair and you're just sure they're going to fall at any minute, it looks so unsafe! (Or maybe that's just me?) But when you tip back in your chair it feels totally safe. So I'm sure Jeremy felt totally safe, but I was pretty sure he was going to fall off that ladder, chainsaw in hand, at any moment and die a horrible death. Geez, I guess I asked for it when I nagged him for years to cut these darn trees down!
Skip to the end: Jeremy got the huge branch out of the Kitalpa with no injuries to either of us and he cut a second branch off the junk trees for good measure.
Now there is a huge pile of brush to be dealt with - which the neighborhood birds are going to go bonkers over. I don't know why, but they love hanging out in brush piles, dozens and dozens of them. I'll see if I can catch them in the act this weekend.
(In other news, I am very annoyed with Blogger/Picasa/etc for constantly having to update and change things that worked perfectly well before! They have made it very difficult for me to put pictures and text where I want it! Grr!)