Saturday, January 30, 2010
Freezer challenge: bacon, corn, chipotle peppers, chicken stock!
Okay, it took us half an hour of looking at these photos and discussing things to figure out what on earth we had made with these ingredients. But then we finally remembered (and we only made it a week and a half ago!). Jeremy found a recipe for Cheddar Corn Chowder. It originally came from The Barefoot Contessa cookbook, was adapted by some blogger over at Pink Parsley, and then picked up by Saveur magazine (which is where Jeremy found it).
Jeremy of course adapted it yet again!
Cheddar Corn Chowder
(adapted from Pink Parsley, who adapted from Ina Garten, The Barefoot Contessa cookbook)
• 2 ounces bacon, chopped
• 1 1/2 tablespoons olive oil
• 1 large onion, chopped
• 1 tablespoon unsalted butter
• 1/8 cup all-purpose flour
• 1/2 teaspoon salt
• 1/4 teaspoon freshly ground black pepper
• 1/8 teaspoon tumeric
• 2 1/4 cups chicken stock
• 2 1/2 cups creamed corn (or whole kernel corn)
• 1/4 cup heavy cream
• 1/8 lb sharp white cheddar, grated
• 2-3 tbsp roasted chipotle/pablano pepper paste
• 1 tablespoon corn meal
Cook the bacon in a large stockpot over medium-high heat until crispy, about 5 minutes. Use a slotted spoon and transfer it to a paper-towel lined plate. Reduce the heat to medium and add the onions and butter to the fat. Cook until the onions are translucent, about 10 minutes.
Stir in the flour, salt, pepper, and turmeric and cook for 3 minutes. Add the corn and cook, stirring frequently, 3-5 minutes.
Add the chicken stock and bring to a simmer. Add the heavy cream then use a blender or food processor to blend small batches of the chowder to break up the corn (only puree about half to 2/3 of the soup).
Allow to simmer 15-20 minutes, stirring occasionally. Stir in the cheese, chipotle peppers, and cornmeal. Taste and adjust seasonings if necessary. If it is too spicy, add more heavy cream or chicken stock. Allow to cook an additional 5 minutes.
Serve hot with garnishes of bacon and extra cheddar.
The amounts are kind of funny because Jeremy halved the original recipe. In fact, he usually uses recipes as general guides and adds/deletes things as he feels led. So I'm not sure if you made this dish with these amounts that it would turn out the same way! But in any case it was very tasty. So much so, that we ate all of it before taking a picture of the final chowder!
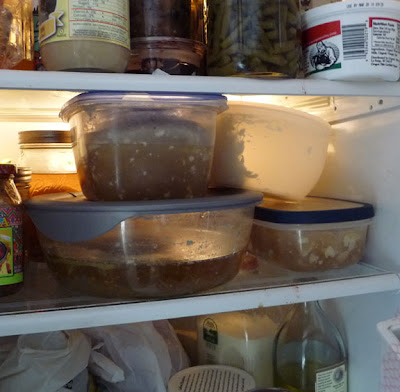
And we were very proud of it because of how many freezer/pantry/refrigerator items it used: bacon, onions, chicken stock, corn, and those hot peppers. Even the cornmeal is stored in our fridge!
Friday, January 29, 2010
Freezer challenge: roasted red bell peppers
Okay, so the bell peppers were the only thing to come out of the freezer, but this dish also included kohlrabi which we found languishing in the back recesses of the fridge. So, it kind of counts.
This is based on the tofu scramble which Jeremy learned about when he worked at the Seward Cafe.
We had a half pound of tofu left over from another dish so Jeremy cubed that and marinated it in a mix of tamari, fish sauce, and sesame oil (for 2 or 3 hours). He peeled and sliced up the kohlrabi and steamed it till it was cooked. We don't have a wok so Jeremy did his best in our copper frying pan. He browned/cooked each of the vegetables in the frying pan on their own, then set them aside, and he did that with the tofu too. (Jeremy is now telling me that you don't want the vegetables & tofu in the pan at the same time because then the pan is cooled too much and there wouldn't be a good sear on everything. So, batches.)
Once everything was seared/browned/cooked, he threw it all into the pan to warm up for a minute and poured in the marinade to make a bit of a sauce. Then it was served over rice. Holy cow. This was very tasty!
Thursday, January 28, 2010
Freezer challenge: strawberries
We have a lot of strawberries in our freezer. From 2008! We didn't get through them in 2009 (we didn't even freeze a new batch) and we're still eating them. In fact, our freezer kind of smells like strawberries.
I find that strawberries are better fresh, not frozen, and I don't really like them in most baked dishes. They just turn into giant, wet, slimy, blobs inside muffins or scones.
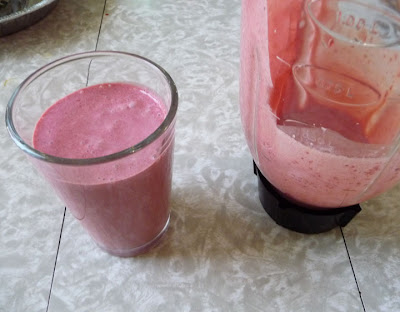
But, they make excellent and very tasty smoothies.
Jeremy makes our strawberry smoothies with strawberries, heavy cream, vanilla, maple syrup, and one egg (from our chickens of course). He kind of throws things in and blends until the consistency is right - so I don't have much of a recipe.
Mmmmm, tasty!
Wednesday, January 27, 2010
Freezer challenge: tomatoes, kale, bell peppers
What do tomatoes, bell peppers, and kale all have in common? They all live in our freezer!
For the next couple days I'll update everyone on our freezer challenge progress.
First is Jeremy's take on vegetarian lasagna. Jeremy' isn't a big pasta fan so I think this only had two layers of lasagna noodles. He made his own red sauce with our frozen tomatoes and frozen roasted bell peppers, and some of our onions and garlic that have been stashed away. The green layer is a mix of ricotta and kale from the freezer, blended up in the food processor. Then of course lots of mozzarella sprinkled over the top.
Voila! Vegetarian Lasagna (obviously so good it didn't need a side).
Monday, January 25, 2010
Goal setting
When you're working on a big project like this house, it's helpful to set goals. You have to take things in smaller pieces and accomplish one thing at a time. Otherwise it is too overwhelming.
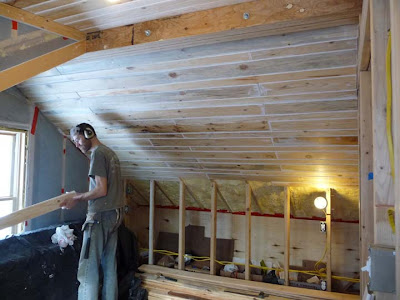
A week ago Jeremy started putting the wood paneling up on the ceilings. A week later, we've almost made our goal of getting the ceiling up by the end of the weekend. (There are only a couple more boards to put up to finish it.)
Of course, our other goals last week were to get the ceiling done by Friday. Then to get it done Saturday, then to get it done by the end of the weekend. So now I'm pretty sure it will get done today! Flexible goals are important.
So here's Jeremy finishing the ceiling on the bedroom side:
And then I painted the whole thing...
...while Jeremy got to work on the study side...
Then he finished that side and I painted it too
Back to the bedroom side, and Jeremy is just finishing up with that little ceiling part at the front of the house.
We got an idea from the wood guy about cutting an angle off the pieces of wood when we had to line them up. This makes it match more with the tongue-and-groove style. It's an extra cut to make, but it looks really good. Here's a detail shot - the horizontal groove is what the wood came looking like. The vertical groove is what Jeremy cut for where those two pieces of wood met.
Hopefully today Jeremy will start working on the west wall, but we've only got a couple days to work on that because we're heading to Oregon for Christmas with my family. When we get back next week there will only be a couple weeks before Jeremy gets started on mushrooms. And then we've got to start planting seeds for the garden. It's going to be even busier around here - if that's possible!
A week ago Jeremy started putting the wood paneling up on the ceilings. A week later, we've almost made our goal of getting the ceiling up by the end of the weekend. (There are only a couple more boards to put up to finish it.)
Of course, our other goals last week were to get the ceiling done by Friday. Then to get it done Saturday, then to get it done by the end of the weekend. So now I'm pretty sure it will get done today! Flexible goals are important.
So here's Jeremy finishing the ceiling on the bedroom side:
And then I painted the whole thing...
...while Jeremy got to work on the study side...
Then he finished that side and I painted it too
Back to the bedroom side, and Jeremy is just finishing up with that little ceiling part at the front of the house.
We got an idea from the wood guy about cutting an angle off the pieces of wood when we had to line them up. This makes it match more with the tongue-and-groove style. It's an extra cut to make, but it looks really good. Here's a detail shot - the horizontal groove is what the wood came looking like. The vertical groove is what Jeremy cut for where those two pieces of wood met.
Hopefully today Jeremy will start working on the west wall, but we've only got a couple days to work on that because we're heading to Oregon for Christmas with my family. When we get back next week there will only be a couple weeks before Jeremy gets started on mushrooms. And then we've got to start planting seeds for the garden. It's going to be even busier around here - if that's possible!
Sunday, January 17, 2010
Going up!
The wood, that is. Jeremy put up some trim to start and yesterday he started putting up the wood. I'm so excited I can't stand it!
This somewhat bizarre shot is from the floor in the bedroom doorway, looking up to the ceiling. We're putting pine tongue-in-groove paneling on the walls and ceiling. We're going to be painting it white when it's done.
I didn't mention before where we got the wood from. I'm pretty sure Jeremy found this guy on Craigslist (not surprising). He lives here in Minnesota, about two hours north of us. He cuts the wood and mills it, dries it, does whatever needs to be done to turn out some fantastic wood products. We got wood ready for flooring, wood ready for the paneling, trim wood, and wood for new stairs. Jeremy and our wood guy had a conversation about supporting local business and small businesses as they were loading the wood onto the front porch.
One thing we've both really enjoyed about this wood is how real it is. Not that wood flooring/paneling from Home Depot or some such store isn't real. But it's too perfect and would never have an end that looks like this:
Our wood is beautiful and has a lot of character. It is going to mean an absolutely beautiful space to live in.
While I've got you here, just thought I'd include a couple photos of what it looks like outside. I'm so used to it, I forget other people are just getting rain or having temps in the 50s!
(good luck finding our raised beds under all that snow!)
(or any mushrooms for that matter!)
Tuesday, January 12, 2010
Another guessing game
It has been even longer since I talked about our quilt. I got the first two squares done in October as well as cutting out all the pieces. I think I sewed some of the triangles together but then other projects intervened. And, as any of you quilters know, a big quilt means a lot of monotony. Nothing like sewing 100 or so of the same pieces to each other, over and over and over - and then ironing, over and over and over. One must take breaks.
But I was inspired again after Christmas and took up the project again.
These were from last week and I've gotten farther along than that since then.
The big question now is, when will I finish it completely?
Jeremy is really hoping it will get done by the time we move upstairs (which could be as early as mid-February!) I'm not sure if that is possible, but I can quilt crazy-fast when the mood strikes.
My only goal is to get it done before August. If it turns out to look as cool as we're hoping, I'm thinking about entering it into the state fair.
So here's the guessing game: Everyone make a guess as to when you think I'll finish this thing. The person who comes closest to the date will get ... some sort of prize I'll think up later. =)
Monday, January 11, 2010
Guess...
Guess where we are?
a. a lumber yard
b. our house
Answer: our house of course!
It has been a whole month since I talked about the house! Can you believe it? Not too much has happened in that time. We finished the insulation and then we had to put vapor barrier up. The electrical is working and mostly installed.
Jeremy decided to shim the floors after a lot of back and forth. He decided that though it would be a pain, it would make things a lot easier in the long run. The floor has some major dips and sags. It would have been easier to deal with this when the whole floor was open and there weren't any framed walls up - but back then we were still thinking about keeping the floor as it was. Oh well.
We ordered the wood for the walls and floor and were just waiting for it to arrive. It finally arrived yesterday.
We have to wait awhile for the wood to adjust to the temperature and humidity of the house, and then we can start installing wood! Wahoo!
Wednesday, January 6, 2010
Christmas, part II
As promised, I'm back with more Christmas photos! I just wanted to show off some stuff we made for Christmas gifts for Jeremy's family.
First, here is a small quilt I made. My favorite part about this is that I had almost all the fabric already on hand! I love getting new fabric, but I also really love just having what I need already there. I had to get the frog backing, but only because it just HAD to have frogs on it!
I also had in my stash some really light weight, soft cotton so I made a stack of hankies.
Remember back to October and the couch cover I made for Jeremy's sister's family? They wanted pillows to match it so I made these with the leftover fabric (and some green fabric they found). They are ridiculously girly. Victorian I believe Meg called them.
Then a neighbor down the block gave me several yards of this material and I realized it would fit perfectly - so I made a second pair of pillows for them.
Jeremy's brother got these pillows - made out of flannel. The red material came from a man's shirt I picked up at the thrift store.
Our niece wanted a teapot and tea cozy so we found this adorable set (on Craigslist of course) and I made a chicken tea cozy to go with it.
And lastly, Jeremy got a bunch of belts at the thrift store and made this cool sword belt for our nephew.
After we gave it to him he found two other attachable sword things to put on it and came out with something like 5 or 6 swords and daggers and knives and a shield (all wooden I believe). He was pretty excited.
Sunday, January 3, 2010
Chicken Stock
We are big believers in not wasting things and one of those things that people often (incredibly) waste are chicken carcasses. It is incredibly easy to make great chicken stock from the bones of your chicken feast (or turkey stock, vegetable stock, fish stock, meat stock, etc!) You just throw in the old carcass, some veggies, some herbs, and some water - then simmer it for awhile and voila!
The problem for us is where to put all that chicken broth. Usually Jeremy freezes it in some large and medium size glass containers. When they're fully frozen I remove them from the container (which is not easy, let me tell you) then we pop the giant chicken broth ice cubes in plastic bags in the freezer. Then when we need a little chicken broth we go through a long process of thawing and chipping and thawing and hacking at the giant ice cubes till we get enough broth for whatever recipe we're making. Aargh! It can be a long and frustrating process - though not enough to make us buy chicken broth from the store.
Imagine our surprise and delight when I found out last fall that we could can chicken broth! Now it seems perfectly obvious (I mean, you can buy cans of chicken broth at the store!) but for some reason it was a surprise.
Canning chicken broth, we realized, was one way to help out in our freezer challenge. Jeremy found several chicken carcasses and a duck carcass in the freezer and a bag of chicken feet - which is an excellent addition to stock (we get them from a local farmer). He made a ton of stock.
We also rescued a number of containers of frozen chicken broth and thawed those out to can as well.
After processing them in the canner, they made this funny popping sound for a good 10 minutes.
We got 16 quarts of chicken stock. Now we can just grab a quart off the shelf and we don't have to bother thawing them out! Wahoo!!
Saturday, January 2, 2010
An icy new year
We got a last minute invitation on Thursday to join a friend over at Minnehaha Falls. (The same friend who led the sky candle adventure last year.) She would be ringing in the new year behind the ice curtain of Minnehaha Falls - lighting candles, reading poetry, making wishes for the new year, and we would be able to see the full moon rising. We were in!
We bundled up in warm clothes and climbed down the rather treacherous stairs, hopped over a "no entrance" sign, and trekked over to the falls. It was amazing...
On our approach to the falls - it was still a little light out.
As we climbed out of the valley we looked back and saw one of the candles glittering (on the far left). You can't see the candles lighting up the ice sheets because there are some enormous lights just over the falls - keeping everyone safe in the dark I'm sure...
The moon was enormous and butter yellow when it first rose.
bonus pic: it has been very cold here the last couple days - hello January! With windchill it has been down to -35. These gorgeous ice patterns formed on our windows yesterday and they've stuck around all day